The Beginner's Guide to Picking FPV Drone Parts
There’s the learn-everything-before-starting way, and then there’s our slightly unconventional method of learning only what’s necessary to get in the air.
There’s the learn-everything-before-starting way, and then there’s our slightly unconventional method of learning only what’s necessary to get in the air. Here, we're not only providing you with the basics, but we're also pointing you to the right place if you want to understand more. Veteran quad builders might oppose this method, but this is really meant for beginners who need a bit of guidance on picking parts for their first build.
Like we mentioned in our How to Get into FPV in 2024 issue, there are so many nuances with each part type, that as a beginner, you’re going to be overwhelmed. This is our take on learning just enough about the considerations and interdependencies of each part to be able to build a quad yourself and get in the air faster.
The Parts List
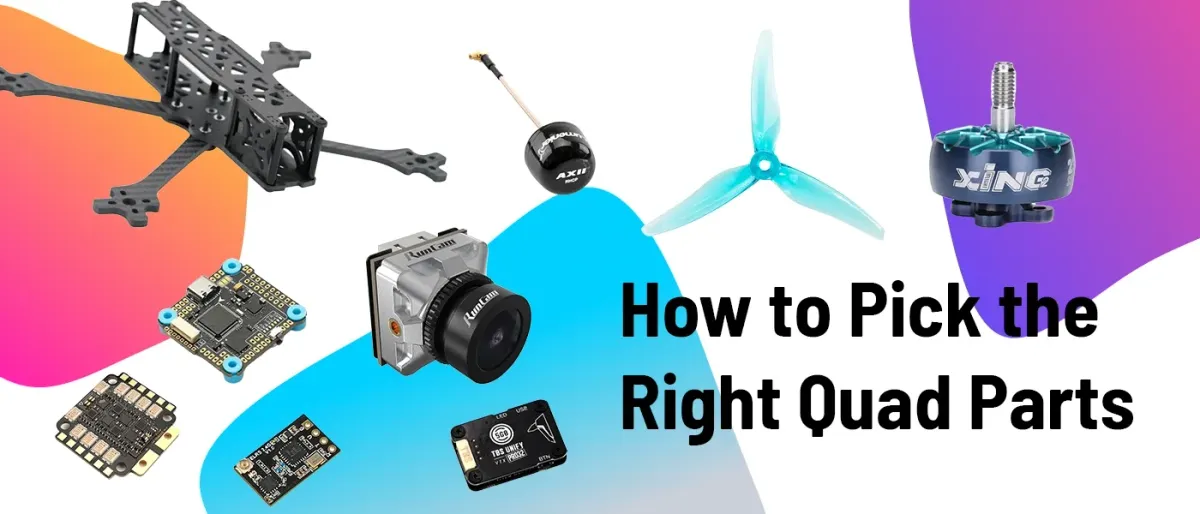
These are the parts you'll need to build a FPV drone:
- Frame
- Flight Controller
- ESC
- Motors
- Propellers
- Video Transmitter with antenna
- FPV Camera
- Radio Receiver with antenna
- Battery
Frame
Your quad is purpose-built. By now, you probably have a good idea of what you want to build and what kind of flying you want to do. Using this, you can select the frame size you need. To assess a frame, most pilots look at availability, price, and reviews. As a beginner, if price permits, you should look for a frame that lots of people have used. This way, when you inevitably have an obscure question, someone likely has gone through the same thing and can answer your question.
In the United States, frames are denoted in inches referring to the propeller size they accommodate. In pretty much everywhere else in the world, frame sizes are detonated in millimeters by their wheelbase, or the diagonal distance between the motors.
We in America love to mess with measurements so here is a handy list of rough guidelines for frame sizes based on wheelbase, prop size, and typical use cases.
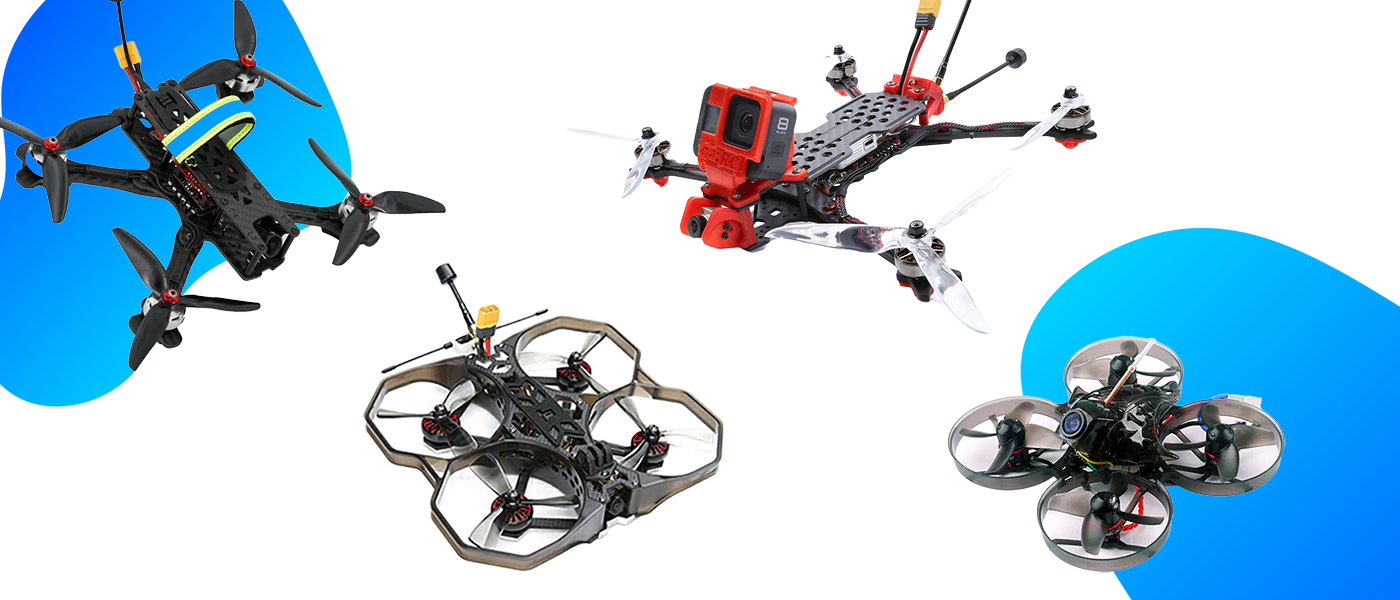
| Size (US) | Wheelbase mm | Quad Type | Flying Style |
|---|---|---|---|
| 2in or smaller | <100mm | Tiny quad/whoop | Indoor / practice |
| 2.5 - 3in | 110 - 120mm | Micro quad/whoop | Indoor / cinematic |
| 3in | 120mm | Mini cinewhoop | Cinematic |
| 4in | 150 - 180mm | Long-range micro quad | Long-range |
| 5in | 200 - 220mm | Freestyle and racing quad | Freestyle / racing |
| 6 - 7in | 230mm+ | Long-range mini quad | Long-range / heavy payloads |
Find frames by quad type and by size on QuadPartPicker.
Flight Controller
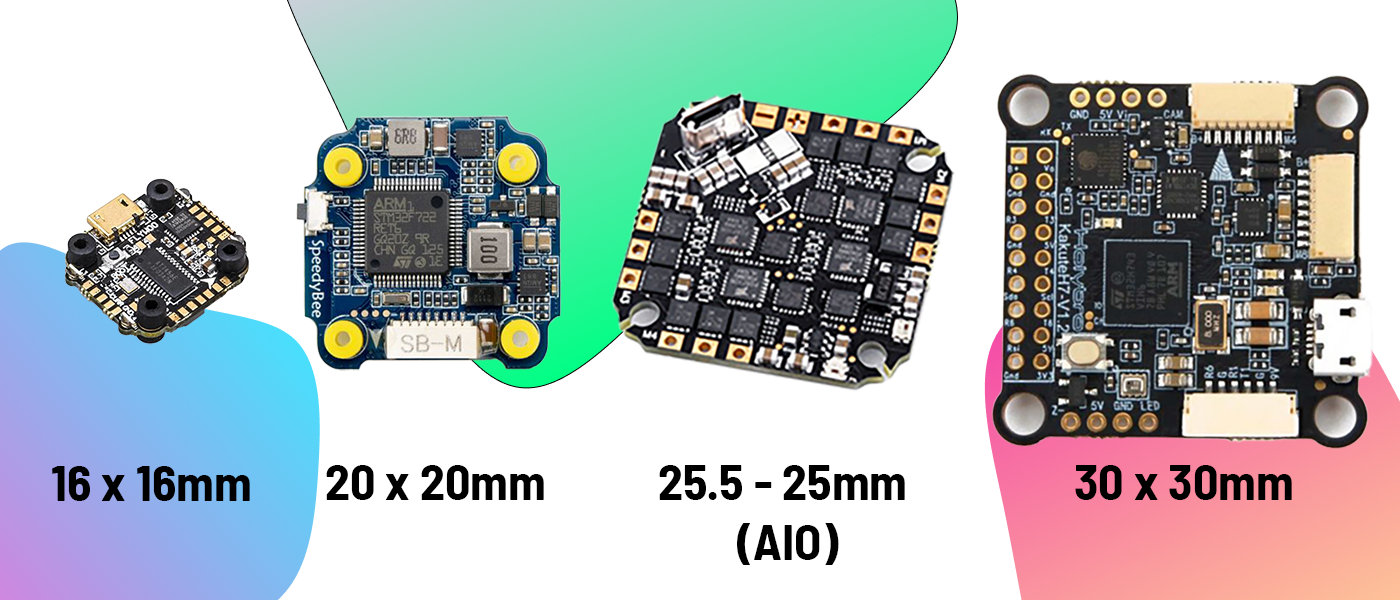
Your quad’s flight controller is your quad’s brain. It’s responsible for linking all electronics together to process all the possible inputs and outputs. As a beginner, you’ll likely only need to find a flight controller with a mount size that matches your frame. Keep in mind that some frames only have a center mount, while other frames have center and rear mounts allowing for more configurations for your electronics.
Here are the common mount sizes:
| Mount Size | Commonly Found On |
|---|---|
| 30 x 30mm | Mini and full size quads. Sometimes denoted as 30.5 x 30.5mm. |
| 25.5 x 25.5mm | Whoops and toothpick quads. Mounted in diamond shape. |
| 20 x 20mm | Micro and mini quads. Most frames have mounts for 20 x 20mm and 30 x 30mm. |
| 16 x 16mm | Tiny and micro quads. This is the smallest mount size. |
Processor
As a beginner, another consideration is your flight controller’s processor. In short, select an F4, F7, or H7 flight controller and you’ll have a modern processor that works with the latest firmware. F4s are the cheapest and most time-tested, while H7s are newer and more expensive.
Stack / AIO
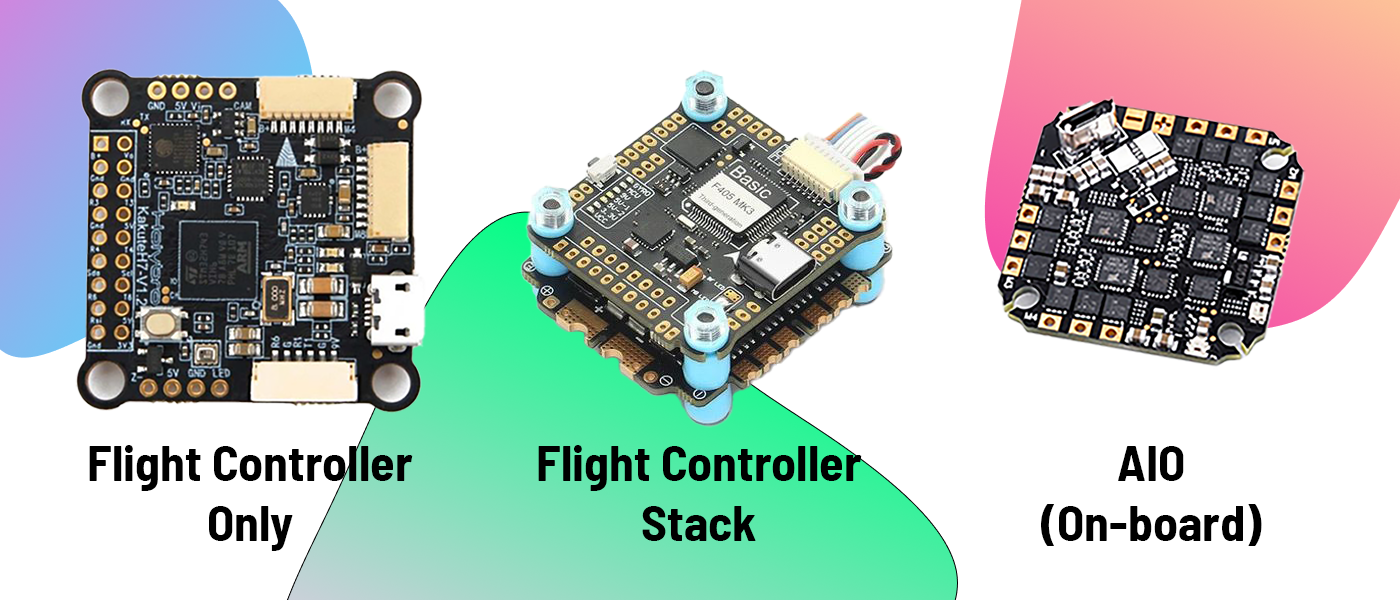
The last beginners’ consideration when selecting a flight controller is if you want a stack or AIO. These are flight controllers that have other necessary components that come together as a kit or built into the flight controller board. Usually, these additional parts are ESCs and/or video transmitters. The advantage of getting a stack or AIO is that sometimes the wiring is plug-and-play between the parts, and you know that there was some testing between the parts to validate that they work as intended. As you select your FC, just know that if you select an AIO or stack with these components included, you don’t have to purchase them separately.
Find flight controllers by size, processor, and stack on QuadPartPicker.
ESC
Think of your ESC as your quad’s gearbox. It handles all the voltage from your battery, takes signals from your flight controller, and controls how your motors spin. You will either select a flight controller with an ESC included, or select a stand-alone ESC.
Amp Rating
The most important factor when selecting an ESC is the Amp Rating. When you look at the specs for an ESC, it will denote whether it’s 15A, 30A, 40A, etc. The amp rating refers to the continuous amps your ESC can handle. This is important because if your ESC's amp rating is too small, it may fry or fire, especially under high throttle situations. The general best practice is to pick an ESC rated for a slightly higher amperage than what your motor and propeller combo will draw at full throttle.
But how do you know how much amperage you need? You can do a lot of math to figure out what the best ESC amperage is for your quad based on your motor and propeller choices, but for beginners, we like Oscar Liang’s approach. He notes that realistically, a 50A ESC will never die on a 5 inch quad due to too much current, because a 6S lipo battery is limited by how much current goes through the ESC. If you want to learn more about ESCs, his article linked above is a great resource.
Here is a list of typical ESC amp ratings for each frame size:
| Frame Size | Typical Amp Rating |
|---|---|
| 2.5in or smaller | <20A |
| 3in | 20A+ |
| 4in | 30A+ |
| 5in | 40A+ |
| 6in+ | 50A+ |
Depending on your flying style, you may want to adjust this. If you fly slowly and cinematically, these are good guidelines. But if you’re freestyling or racing and putting in a lot of throttle, it’s a safer bet to go with a ESC with a higher amp rating. You can’t have an ESC that has too high of an amp rating, but the higher you go, the more expensive and heavier it will be.
4-in-1 or Single ESCs
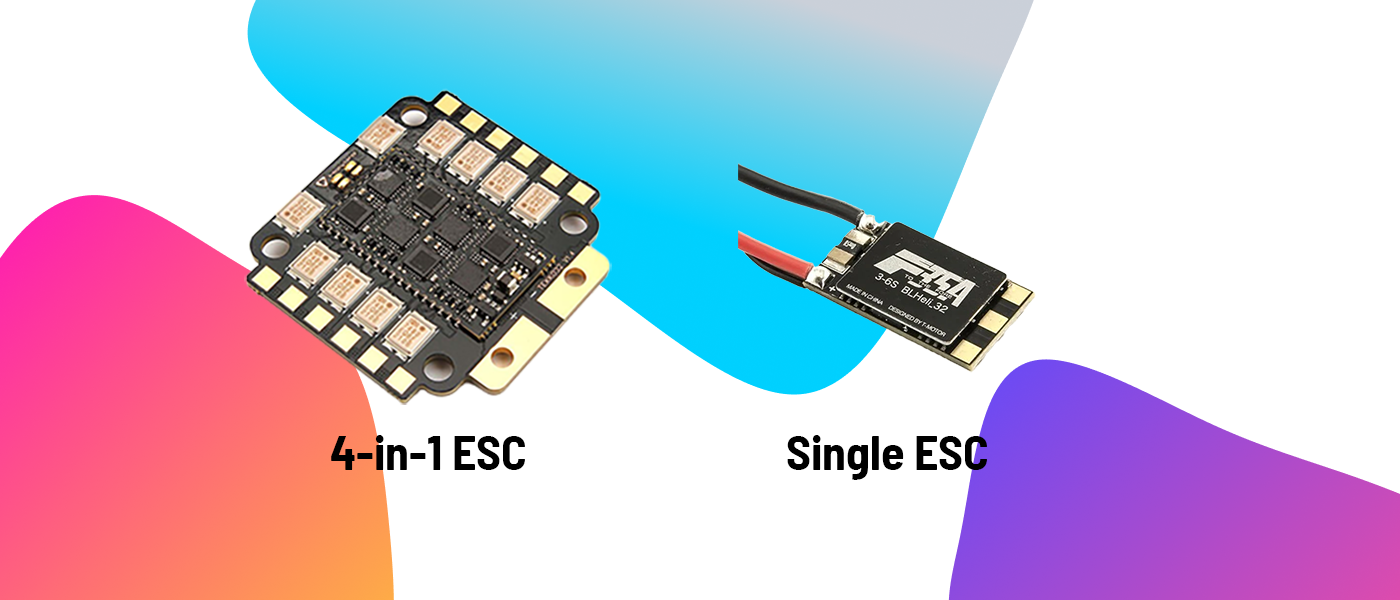
There are two types of ESCs: 4-in-1 and single. Every motor needs its own ESC. Assuming you’re building a quadcopter, 4-in-1 ESCs are a great option for beginners. The case for using single ESCs is if one breaks, you only have to replace 1 ESC, and not the entire board. We generally recommend 4-in-1 ESCs because they will stack nicely on your frame.
Note that for 4-in-1 ESCs, the amp rating is for each ESC, so a 20A 4-in-1 ESC can handle up to 80A of total current.
Stack Mount
Speaking of stacks, 4-in-1 ESCs typically come in the same mount sizes as your flight controller and frame. The best practice is to select a frame with matching mounts for your flight controller and ESC. Single ESCs do not mount, but are adhered to the frame arms.
Find ESCS on QuadPartPicker.
Motors
There are so many motors available and even more nuance to how a motor performs. For beginners, we’re giving you the most basic guidelines, but you can spend weeks understanding how motors work.
Stator Size
Motor sizes, which are commonly denoted as stator size, give you the dimensions for your motor. For example a 2207 motor has a 22mm width and 7mm height. You can use these dimensions to calculate the volume of your motor, which gives you a good idea of that motor’s performance. This is useful for comparing motors of similar stator sizes.
Here is a list of typical stator size range for each frame size:
| Frame Size | Typical Stator Size Range |
|---|---|
| 2.5in or smaller | 05xx - 13xx (the smaller the frame, the smaller the stator size) |
| 3in | 14xx - 18xx |
| 4in | 15xx - 20xx |
| 5in | 22xx - 24xx |
| 6in+ | 24xx+ |
Kv
Unless you’re a serious motor tester or want to get super nerdy about it, selecting a motor on Kv shouldn’t be that difficult. There’s just so much information and so many motor options out there. For a beginner, all you need to know is that higher Kv typically means that the motor will be able to rotate the propeller faster, but at the expense of torque. Lower Kv motors have more torque, but spin slower.
When building for efficiency, larger props are typically paired with lower Kv motors. And smaller props are typically paired with higher Kv motors. This is why tinywhoop motors can go up to 20,000Kv, while large motors for cinelifters are only around 300Kv.
When selecting a motor with different Kv options, most pilots pair higher Kv motors with 4S batteries, and lower Kv motors with 6S. For example, a 2207 stator size motor with 1,800Kv would work well with a 6S battery, while the same motor with 2,400Kv would be paired with a 4S battery. This is because Kv represents the speed that the motor rotates per volt applied. So in our examples for the same 2207 motor:
4S battery at 14.8 volts * 2,400Kv = 35,520 RPM
6S battery at 22.2 volts * 1,800Kv = 39,960 RPM
Both of these combinations are similar with the 6S/1,800Kv combo providing ~10% more RPM.
For a bit more precision when selecting motors, learn our easy method to calculating your all-up weight (AUW) and thrust in our Quad Drivetrain issue.
To get much deeper into motors, Chris Rosser is a great resource. And MiniQuadTestBench is an excellent site to view performance for different motor and prop configurations.
Find motors by stator size and Kv on QuadPartPicker.
Propellers
There’s nothing better than trying out a lot of different propeller combinations yourself. Props are going to break when you inevitably crash, and you can take the crash opportunity to try out different kinds of propellers.
With your frame already determined, the main consideration is your prop length. So if you were to choose a 5 inch frame, you would choose 5 inch props.
Reading Prop Names
There are two common ways to read propeller product names and descriptions:
Length x Pitch x Blades (ie: 3.5x2x3)
or
LengthPitch x Blades (ie: 3520 x3)
Both of these examples mean 3.5-inch length, 2-inch pitch, 3-blade propellers
Length and Pitch
Generally, longer props and pitch mean more speed at the expense of more power draw. And short prop length and pitch spin faster and are more responsive.
Blade Count
It's very common to fly with 2 or 3-blade propellers. The fewer the prop blades, the more efficient and less power intensive the quad. With more prop blades, the quad gets more inefficient while drawing more power.
Blade Shape
Blades can be narrow and pointy, or fat and stubby. Bullnose-shaped props offer more thrust, but draw more power. And regular pointed props can be weaker, but draw less power.
Clockwise and Counterclockwise
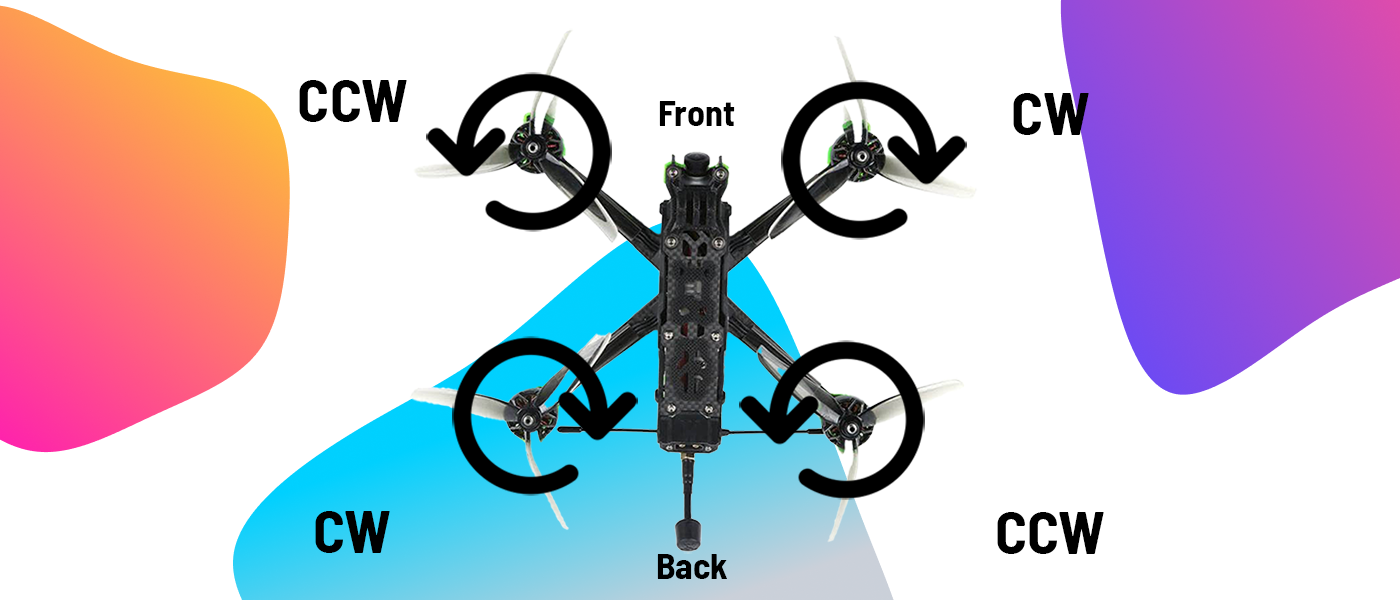
When you purchase propellers, they usually come in a set signified CW or CCW and are usually inscribed on the prop itself. You need 2 of each on your quad and they must be installed correctly for your quad to fly correctly. Refer to the image below on how to position your props. When installing your props to the motors, the CW/CCW inscription should be visible if you have the correct orientation.
Find propellers on QuadPartPicker.
Video Transmitter
Your quad’s video transmitter (VTX) processes the video from your FPV camera and transmits the video to your goggle’s receiver. This is where choosing analog vs. digital HD comes in.
If you’re flying analog, you’ll need an analog receiver connected to your goggles. The biggest consideration is choosing the maximum output power of the VTX. Smaller output power like 25mW are suited for racers, while 1W+ VTXs are suited more for freestyle flying.
If you’re flying digital HD, as of today, you have a few options: DJI v1/v2, DJI O3, HDZero, or Avatar. We recommend looking at YouTube videos to see examples of video quality for each. Generally speaking, DJI has the best video link, while HDZero has the lowest latency. Avatar, the system that Walksnail and FatShark use, are the newest and are showing signs of good performance.
Once you decide, you’ll just need to choose the VTX that fits your needs. The options are limited and mostly perform the same. These digital VTXs also often come with a FPV camera.
Learn more about digital VTXs and Goggles here.
Lastly, for any VTX you choose, make sure an antenna is attached before powering your quad on. If you don’t, you may destroy the VTX.
We’re keeping VTXs short in this issue, but you can learn the ins and outs of VTXs and our recommendations in our other issue here.
Find video transmitters on QuadPartPicker.
FPV Camera
There are a variety of FPV cameras out there. Digital FPV cameras are only compatible with the digital VTXs noted in their product descriptions. An analog camera will not work with digital. And a DJI-compatible FPV camera is not compatible with an HDZero video receiver and vice versa.
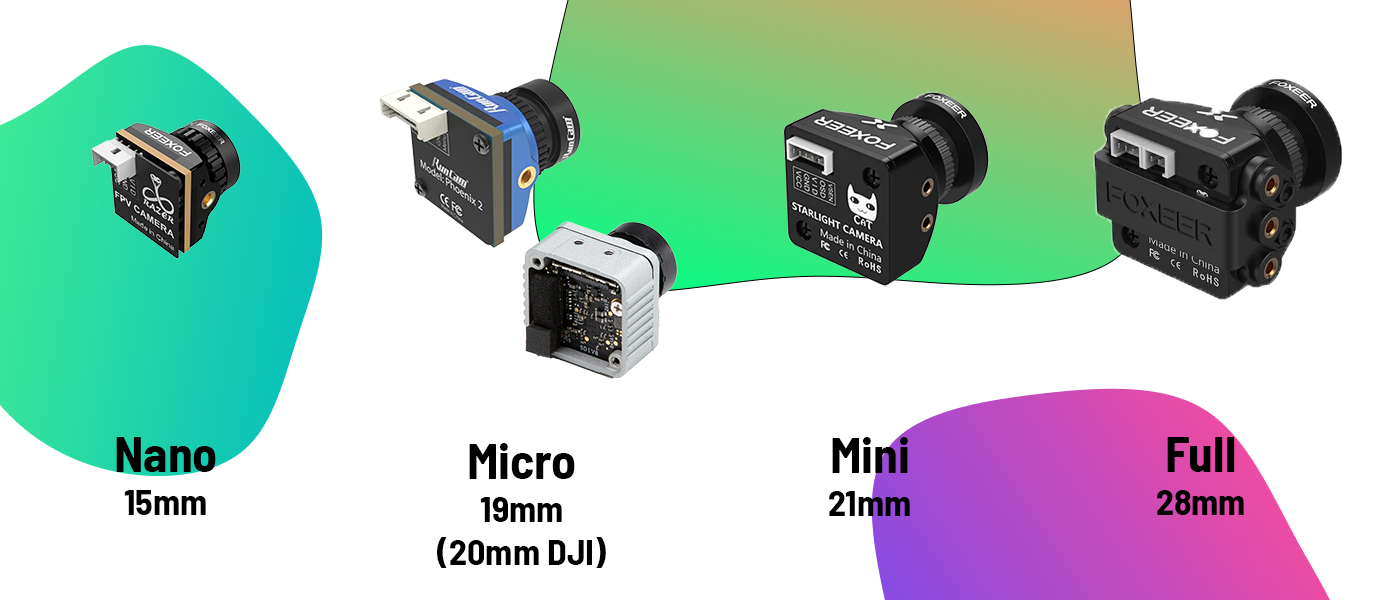
The first thing to consider is the size of your camera which is denoted by the width between the mounting holes. This corresponds to what FPV camera mount size your frame supports. There are also adapters that come with frames or that you can purchase, and they allow you to use different sized FPV cameras with unsupported mounts if there is a specific camera you want to use.
These are four standard sizes, most FPV cameras made today are either Nano or Micro:
The other considerations are aspect ratio and field of view (FOV). Aspect ratio is whether you want a wide view (16:9) or a standard view (4:3) when you look in the lens. Field of view refers to how wide or narrow your image is. This is denoted by the FPV camera’s lens focal length. A shorter focal length (1.8mm) results in a wide field of view, while a longer focal length (3mm) results in a much narrower view. Both of these are based on personal preference. Choose what you think will work best for you.
Find FPV cameras on QuadPartPicker.
Receivers
Your quad’s receiver takes the inputs from your radio and tells the flight controller what to do. Since you have a radio from flying on the sim already, (and if you don’t, you should figure this out first!), this decision is already made for you. Our recommendation is to get an ExpressLRS (ELRS) receiver and a compatible transmitter or transmitter module if you don’t have one already. We believe the future in radio links is ELRS because it is open-source, inexpensive, and performs very well compared to other available options.
You can learn more about receivers and radios here.
Find receivers on QuadPartPicker.
Antennas
Your antennas send or receive the signals from your video receiver, video transmitter, radio receiver, and radio transmitter. In some cases, antennas may be included with those parts mentioned above. In other cases, you'll have to purchase them separately. There is a large variety of antennas available, but for beginners, these are the main considerations:
Frequency
The antenna frequency on your radio transmitter and radio receiver need to match. Common radio frequencies are 2.4GHz or 868/915 MHz. If you’re using a 2.4GHz ELRS receiver, you’ll need 2.4GHz antennas for your receiver and radio.
Most video transmitters transmit on 5.8GHz so for VTXs, you’ll need 5.8GHz antennas.
Polarization
Video transmitter and receiver antennas typically have circular polarized antennas. We won’t get into it too much, but you’ll need to pair antennas to the same polarization to get the best signal. If your goggles have RHCP antennas, your video receiver should also have RHCP antenna(s).
Connector
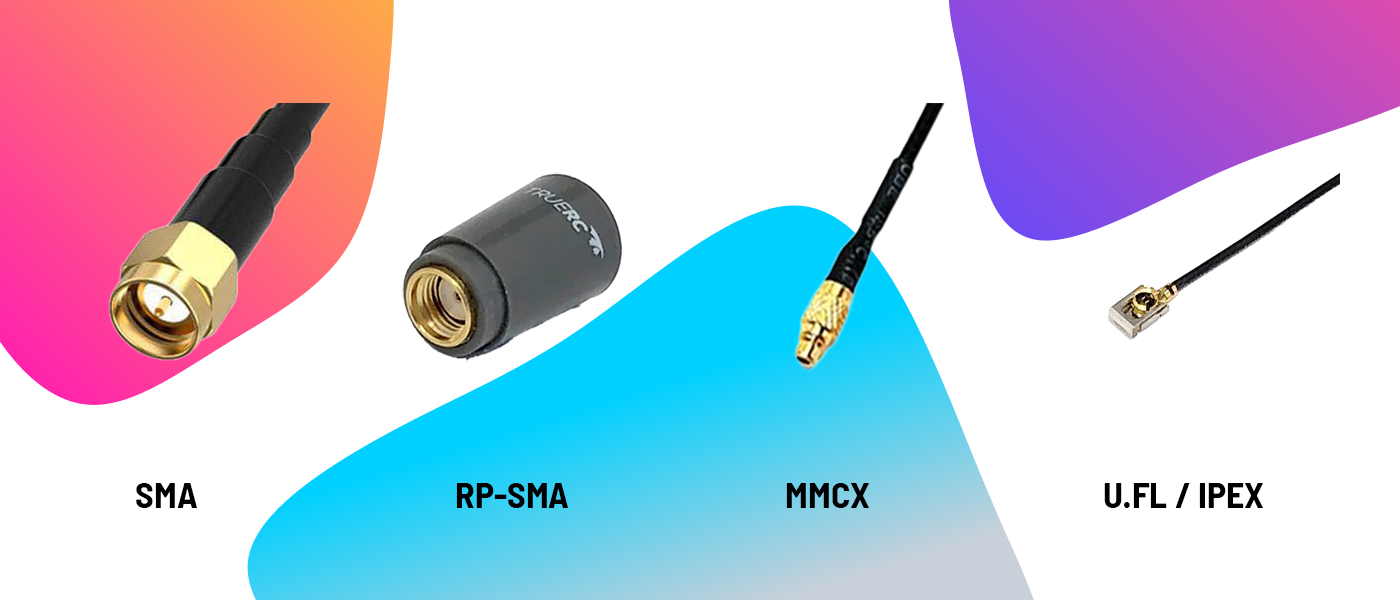
Lastly, you want to consider what type of antenna connector your radio, receiver, VTX, and VRX each support. This way, you can match them without an adapter, which can slightly degrade your signal.
Find antennas on QuadPartPicker.
Alright, we can go on and on! But now you have the bare minimum considerations to choose parts for your first quad build. We encourage you to look for more resources about each part to better understand their nuances and how they can best support your purpose-built quad. Spec out your own quad on QuadPartPicker using our quad builder.
